Create a VM Using Windows 10 Hyper-V
Let’s take a look at setting up a Virtual Machine using the built-in Hyper-V technology. The benefits include the ability to run multiple operating systems at the same time as long as you have enough hardware resources. Personally, I decided to do this because I need to do some compatibility testing. Hyper-V is also an excellent way to try and test apps before using them in your primary production environment. Oh, and it’s a free hypervisor, so that makes leveraging it even better! Pre-requisites
64-bit edition of Windows 10 Pro or Windows Enterprise. Hyper-V isn’t available in Windows 10 Home edition.Your CPU needs to support SLAT technology. To find out if it does, read our article on SLAT (Secondary Level Address Translation) extension that will help you determine if the PC can even run Hyper-V.Virtualization must be enabled in your computer’s BIOS or Firmware.
Enable Virtualization
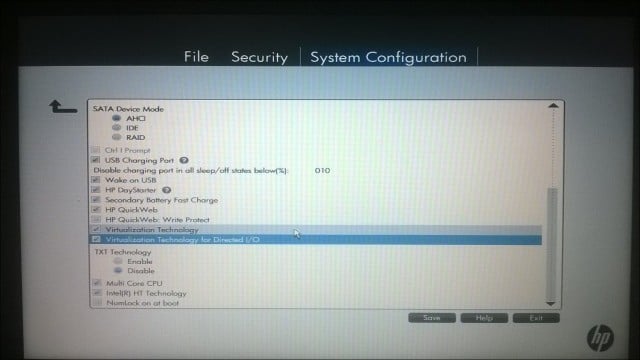
Restart the computer and enter BIOS setup (usually by hitting the F2, F10, or F12 key) on your keyboard before the computer loads the Windows operating system. This process might vary according to the brand, so consult your computer’s manual for instructions on how to load the BIOS. On my Computer, I had to hit the F10 key, select my language, select Security > System Configuration and enable the following:
Virtualization Technology (VTx)Virtualization Technology Directed I/O (VTd)Search virtualization setting in BIOS and enable the settingSave BIOS settings (usually F10)Power off the computer, wait for a few seconds, and start the computer
Setting Up Hyper-V
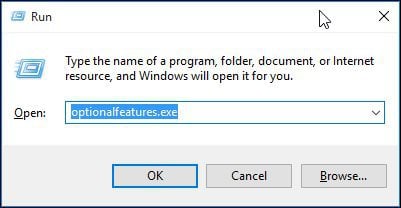
Press Windows key+R and type: optionalfeatures.exe hit Enter.
This action will open Turn Windows features on or off. Once it has loaded all the features, check off all the options for Hyper-V and click OK.
Then wait while Windows installs and configures Hyper-V. You will be prompted to restart to confirm changes. Windows will go through a series of restarts and configure your system.
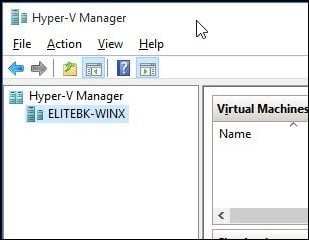
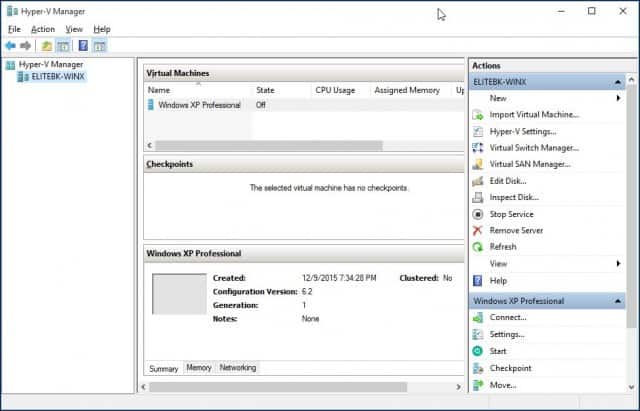
Launch Hyper-V Manager and Create a VM Next, you’ll need to open the hidden quick access menu by hitting Windows key+X and then go to Control Panel > Administrative Tools > Hyper-V Manager.
In the left pane of the Hyper-V Manager, select your machine name. This selection will enable the actions pane on the right.
Under the Actions pane click New > Virtual Machine.
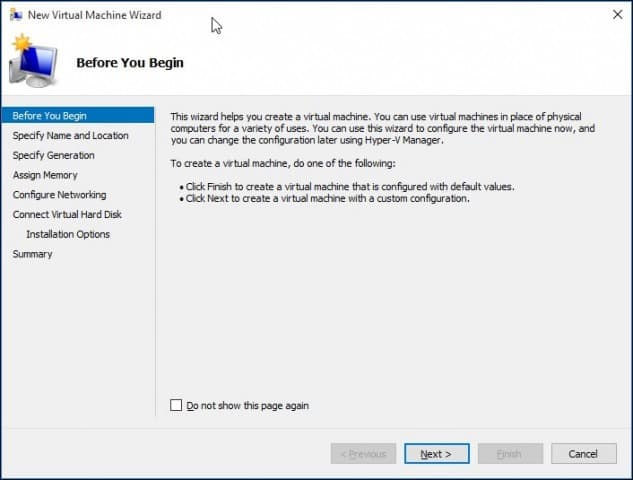
This will start the Create New Virtual Machine wizard. Click Next and follow the on-screen instructions.
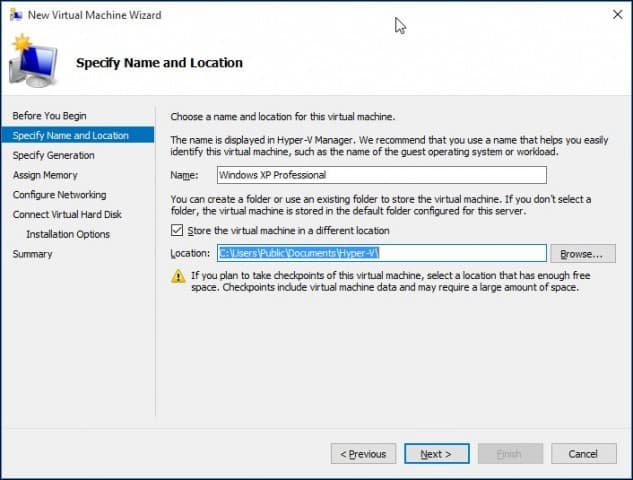
I can give my Virtual Machine a name and specify its location where I want it stored. So if you have additional partitions or a drive, then you can browse and save it there.
Choose the type of generation you would prefer to use. If you are basing your needs around legacy or older applications, go with Generation 1.
Choose how much memory you would like to give the virtual machine. This choice will be dependent on how much you have available. The more, the better. For my purposes, I will be doing application testing, so this should be enough for the operating system in addition to the applications I will be testing. If you have limited physical RAM installed, 2 GB or less, uncheck Use Dynamic Memory for this virtual machine.
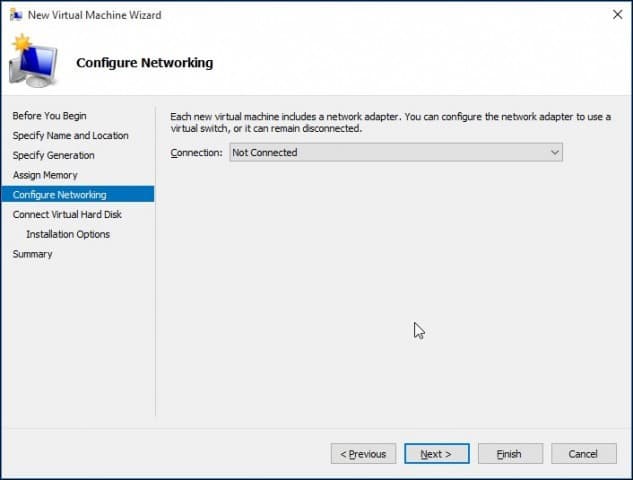
If you see a similar screen shown below, click Next to continue. You can always configure your Network settings after.
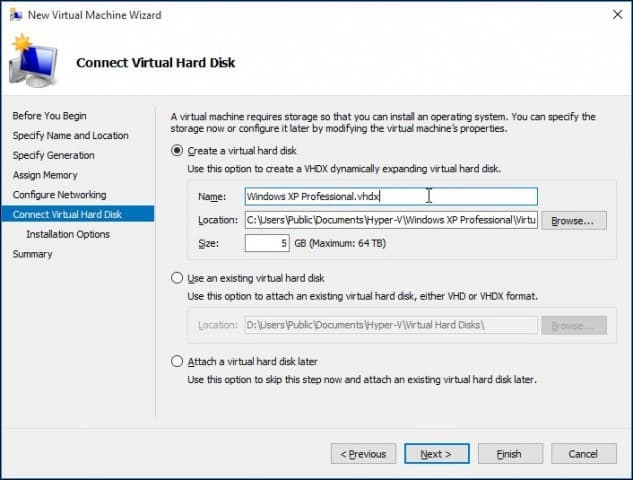
Configure your Virtual Hard disk where you will install the operating system. You can make quick changes here such as the location where it will be stored along with the amount of space you would like to give the Virtual machine. Here you can see – I have given the virtual machine 5 GBs of disk space. You can also choose an existing Virtual hard disk if you already have one.
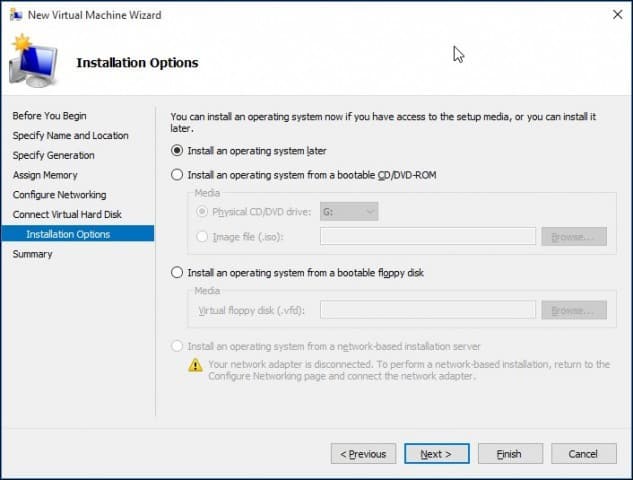
Below you can choose the option to designate the install media or its location or select the option to do so later. I will opt to do so later.
Review your options. You can click Previous and make any necessary changes. Once you are satisfied, click Finish.
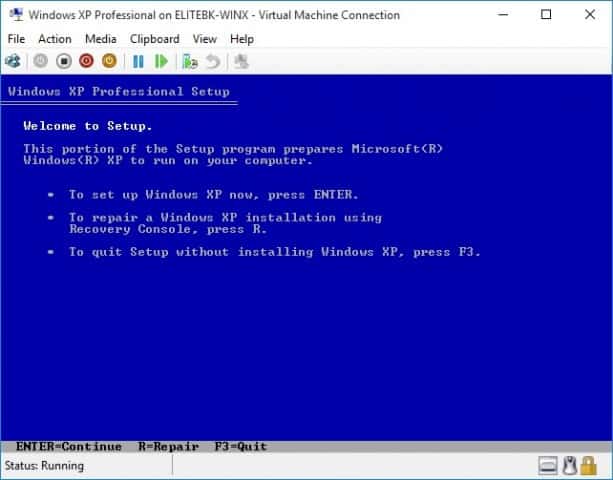
Installing the Operating System
For this article, I will be installing Windows XP Professional. You have a wide choice of operating systems to choose from, which include other versions of Windows and some Linux distributions. Select Install media For this article, I will be using an ISO file image to install Windows from. It’s convenient and easy to do. You can install from a DVD or CD if you wish to do so. In the right pane under your Virtual Machine name, click Settings.
Select the DVD Drive menu in the Hardware tree. Choose whether you will be installing from a DVD drive if your system has one that is available or browse to an available ISO, which is what I will be using.
Click Start or double-click the Virtual Machine itself under the list of VMs to open the instance. This will start the Virtual Machine Manager. Follow the on-screen instructions to install your favorite operating system as you normally would on physical hardware.
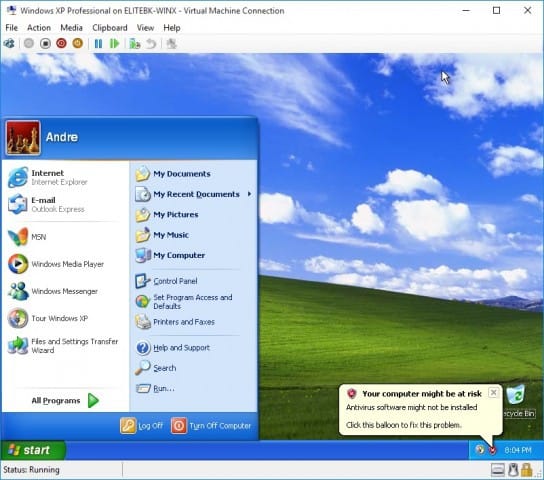
When setup is complete, you should have a successful setup that you can use for testing.
Installing an OS on a VM using Windows 10’s built-in Hyper-V is easy as doing it in other VM programs like VirtualBox or VMware. The beautiful thing about this is, you don’t need to install the third-party software first, and as I mentioned earlier, it’s also free. Additionally, being a native app in the OS I believe provides performance enhancements as well as other features not available in the third-party solutions. If you’re not on Windows 10 yet, read our article: How to Create a Virtual Machine Using Hyper-V in Windows 8. https://www.microsoft.com/en-us/evalcenter/evaluate-windows-server-2012-r2 (But besides, thank you for the above steps, they were super helpful!!) Any suggestions would be appreciated, Charles Using the hyper-v manager I have been able to create a virtual machine, and selected “install operating system later”. Following your instructions above to install the OS, I selected the DVD drive, then opted to select the relevant iso file from my pc (on a local second hard drive, the iso being for Linux Ubuntu). I then start the vistual machine and get the message in the connection window:
- SCSI DVD (0.1) The image’s hash and certificate are not allopwed (DB). 2. Network Adapter (00155D000902) DHCP failed. 3. SCSI Disk (0,0) No UEFI-compatible file system was found. No operating system was loaded. Press a key to retry the boot sequence… Note: Configuration changes may require the virtual machine to be reset. Thanks in advance Hi, in Win8 it’s not able copy text/object with ctrl+c/v between host and main OS. In Win10 is this solved? For ex. VmWare have this function… can I set up a virtual machine on my windows 10 pro system to utilize a separate installed hard drive that contains a cloned drive from my older windows 7 laptop that the motherboard had failed? My system is a HP Envy 17t with Intel i7 HQ with 16 GB ram and two installed 2 TB hard disks (one containing the cloned 7 drive) If yes could you please itemize the steps. Thank you, Dave Also question is if I use something like virtual box and decide to use hyperV is there a virtual file type to use to import? To migrate from VirtualBox to Hyper-V isn’t difficult. You just need to import the drives. Fairly straight forward. Host pc config. ip : 192.168.0.2 subnet : 255.255.255.0 Class C subnet gateway : 192.168.0.1 router IP Vswitch config : ip : 192.168.1.1 subnet : 255.255.0.0 Class B Subnet gateway 192.168.0.2 IP of phisical host NIC Dns : 8.8.8.8 and 4.4.4.4 googles public dns any question please email first VM ip 192.168.1.2 subnet : 255.255.255.0 gateway : 192.168.1.1 second vm etc first VM ip 192.168.1.3 subnet : 255.255.255.0 gateway : 192.168.1.1 my laptop does not support virtualization. Secondly I want to boot my laptop from same VHD used for also virutal box. how to develop such VHD. Clearly written and I’m proof the steps work. I’m looking forward to running a few needed legacy Windows 7 programs (for work). -Team Clastr Comment Name * Email *
Δ Save my name and email and send me emails as new comments are made to this post.


![]()
