For example, you can add a 3D animal to your book report in Word, a building to your company spreadsheet in Excel, a medical instrument to your health presentation in PowerPoint, or an emoticon to an email in Outlook. Along with adding an eye-catching 3D image, you can format it to see a particular angle, make it larger or smaller, or align it perfectly on your page or slide.
Microsoft Office 3D Model Availability
3D models are supported in Microsoft Word, Excel, PowerPoint, and Outlook on Windows and Mac. You’ll see the feature in Microsoft 365 and 2019 and 2021 versions of these Office applications. On Mac, you must have macOS 10.12 or 10.13.4 or later. The feature is not supported on macOS 10.13.0 through 10.13.3 or 10.11 and earlier. You can also use a Microsoft Office 3D model in Word, Excel, and PowerPoint on Windows Phone 10.
Insert a 3D Model in an Office Document
The process for finding and adding a 3D model in all desktop applications is the same. Place your cursor where you want to insert the image and open the Insert tab. Click the drop-down arrow next to 3D Models and select Stock 3D Models. (For those of you who want to insert your own model, select This Device and browse for your model.)
When the window opens, you can use the search at the top and enter a keyword or browse the categories. Currently, there are almost 60 categories of stock 3D models, including animated ones. Select one or more models and click Insert at the bottom.
Your 3D model will pop right into your document. You can move the image where you like by simply dragging. Then, you’re ready to format it!
Format a 3D Model
The simplest way to adjust a 3D model is with the tools in the ribbon. Select the image and then click the 3D Model tab that appears. Here, we’ll highlight just a handful of the tools you may find helpful for 3D models.
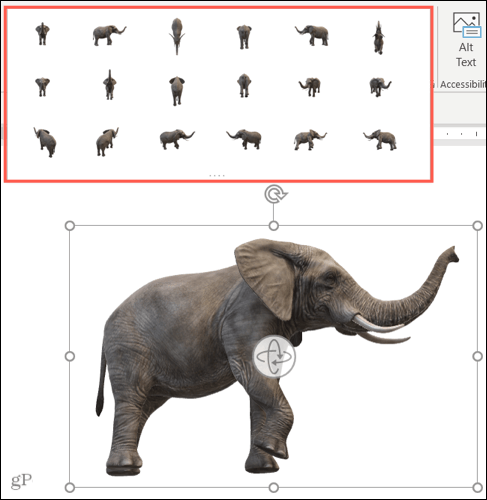
Choose a View
First, you can choose a view for your model. Use the arrows to scroll through the options in the 3D Model Views box, or click the arrow at the bottom to see them all. Although you can easily rotate or tilt your 3D model (described below), this lets you pick the angle you want for the start.
Position With Text
To position your model with the text on your page or slide, you can use the Position drop-down box in the ribbon or the Layout Options button that displays. With these options, you can fix the image’s position, move it with the text, or use text wrapping.
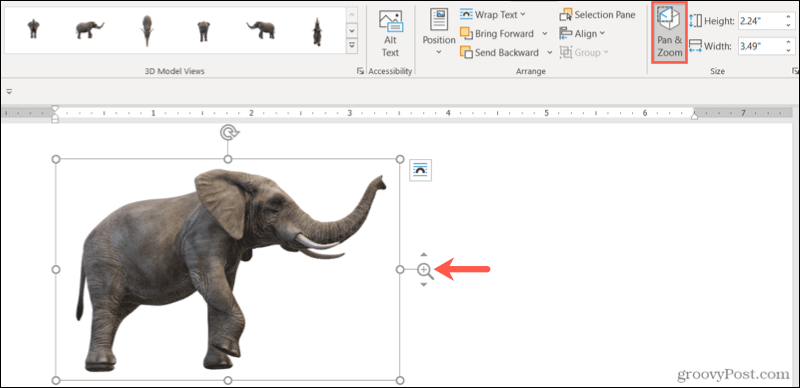
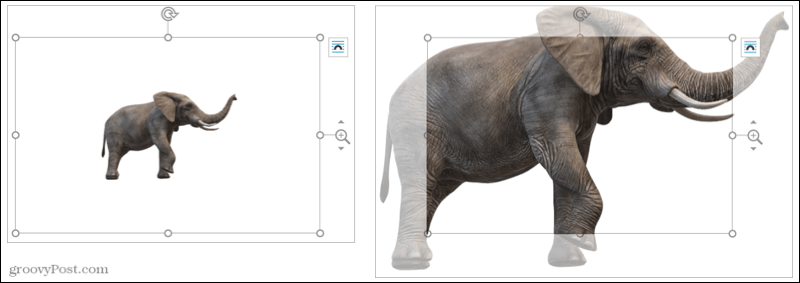
Pan and Zoom
You can resize your 3D model like any other image by dragging a corner or edge. But you can also pan and zoom within its frame, which is a handy feature. Click Pan & Zoom in the ribbon, and you’ll see a plus sign within a magnifying glass appear next to the image.
Next, drag up to make the model larger or down to make it smaller. Remember, this is the size of the model within its frame. So, this is ideal if you want to zoom in on a particular feature or eliminate some white space around the model.
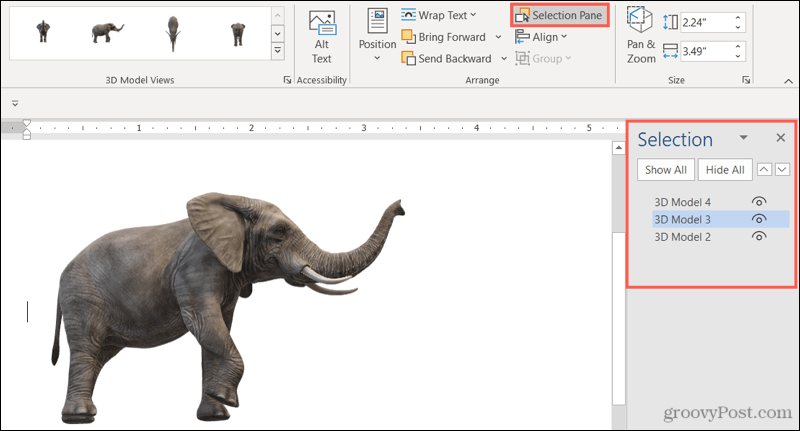
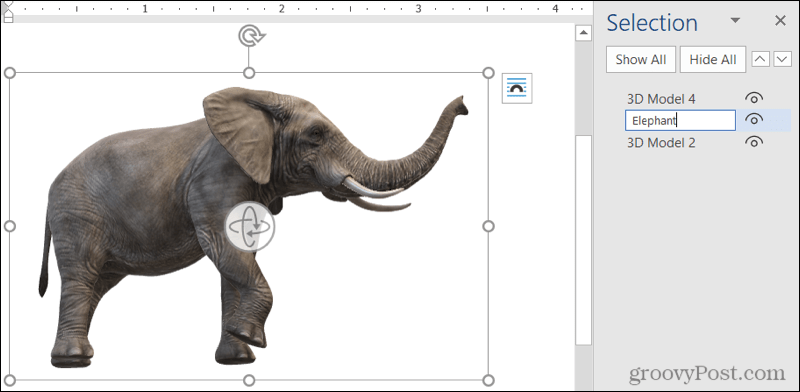
Use the Selection Pane
If you’re using multiple 3D models in your document, spreadsheet, slideshow, or email, you can open the Selection Pane to work with them easier. Click Selection Pane in the ribbon to open the sidebar.
You’ll then see each of the models you’ve added. Select one to make it the active model. You can also rename them to make them simpler to identify by clicking the text and typing your own.
You can also hide specific models so that you can focus on others. Click the eye symbol to the right of a model in the list to hide and show it or use the Show All and Hide All buttons at the top.
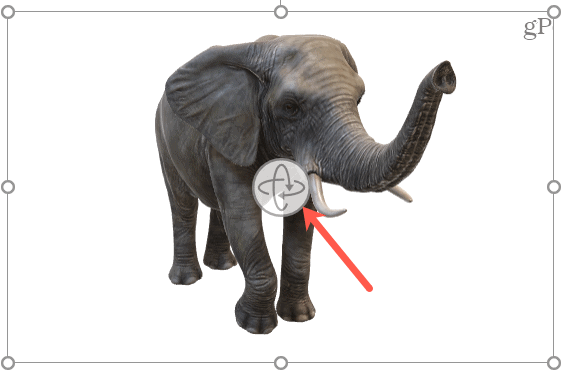
Rotate or Tilt a 3D Model
Each 3D model comes complete with a rotate and tile handle in the center. Drag that handle in any direction to get a specific view of your model.
If you select an animated model, you’ll also see a pause button on the bottom left corner of the frame. Click to pause the animation and then hit the play button to resume.
Make Your Document With 3D
3D models can bring a unique experience to your viewers. Whether it’s a report or presentation for your company or a budget sheet or email for your family, you can spruce it up with a Microsoft Office 3D model. For more, take a look at how to add visual effects to your pictures in Word or how to insert image captions in PowerPoint. Stay up to date with future how-tos by following us on Twitter! Comment Name * Email *
Δ Save my name and email and send me emails as new comments are made to this post.


![]()
