Print Select Areas of Excel Spreadsheets
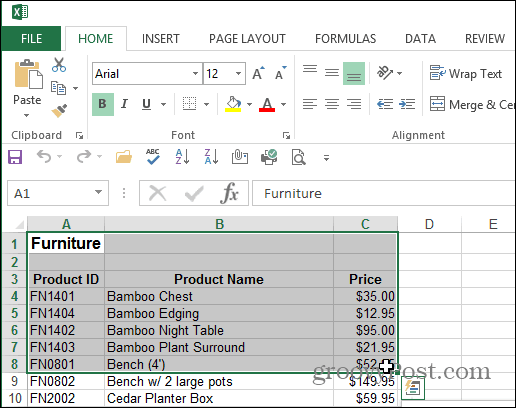
Start by opening the Excel spreadsheet you need, hold down the Ctrl key and highlight the area of the document you want to print out.
After selecting the area you want to print out, go to Page layout > Print Area > Set Print Area.
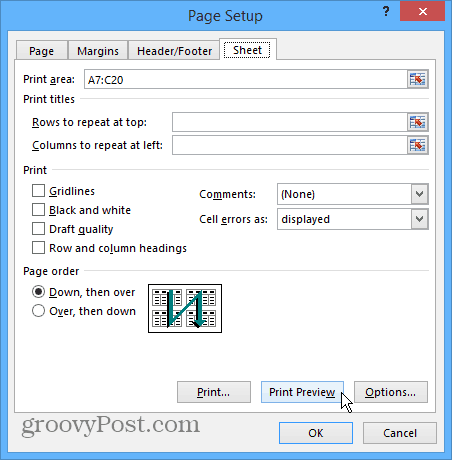
You won’t really notice anything happen to the document at that point, but next, while still under the Page Layout tab, click Print Titles.
Next, select the Sheet tab in the Page Setup windows that appears. From here, type in the Columns and Rows that you want to repeat (if any), then click on Print Preview. This allows you to include any headers or labels associated with the data.
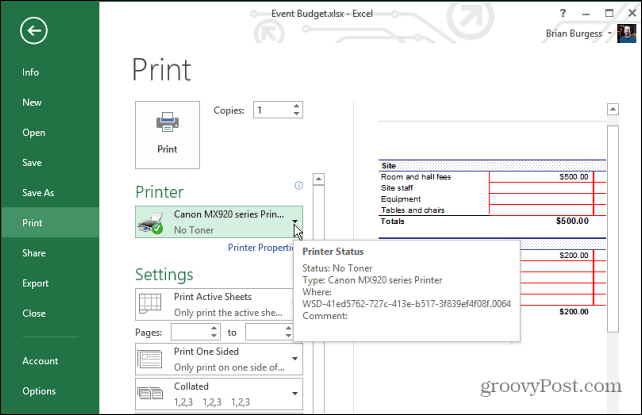
Now you will get a view of the area you’re printing out. And you can select the printer you want to use and adjust print settings. You can get deep into the printer settings. You can tweak the preview area and manually type in more cells if you want to include them.
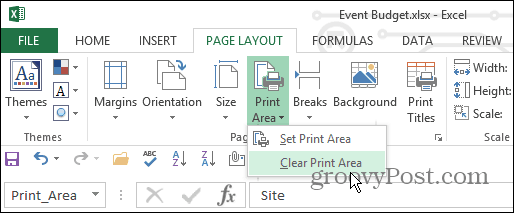
If you get too deep into adjusting print areas, they will stay until you clear them out. From the ribbon under Page Layout, click Print Area > Clear Print Area.
This is a great way to save printer ink and paper, as well as time for you and your colleagues. Nothing is worse than someone printing out 500 pages when you need the printer to get one simple page. Also, remember you don’t need to waste time and ink printing out entire web pages either. If you only want to print out specific info from an article, read our article: How to print only selected text from a webpage. Comment Name * Email *
Δ Save my name and email and send me emails as new comments are made to this post.
![]()
