Microsoft Word provides a built-in Table of Figures option that you can insert and customize. This is especially useful when your document contains more of these types of items than it does text. So, if you’re ready to help your audience navigate to your tables and figures, or even equations, quicker and easier, let’s get started!
Add Captions to Your Tables and Figures
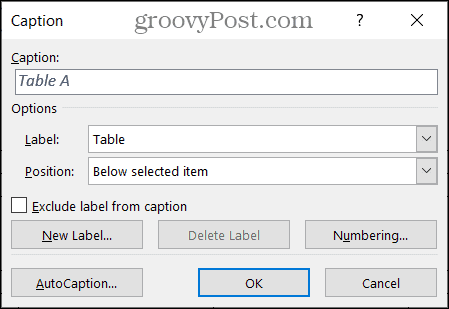
Before you can insert a Table of Figures in Word, ensure that all of your items have captions. These are what allow the table to find and display them. You can select, right-click the table or figure, and choose Insert Caption. This allows you to label the item as a table or figure and give it a number or letter. So you can use Table A, Figure 1, etc.
If you’re interested in details for creating your captions, take a look at our full tutorial on how to work with captions in Microsoft Word.
Insert and Customize the Table of Figures in Word
When the tables and figures in your document are ready to go, place your cursor in the document where you want to insert the Table of Figures. Go to the References tab and click Insert Table of Figures in the Captions section of the ribbon.
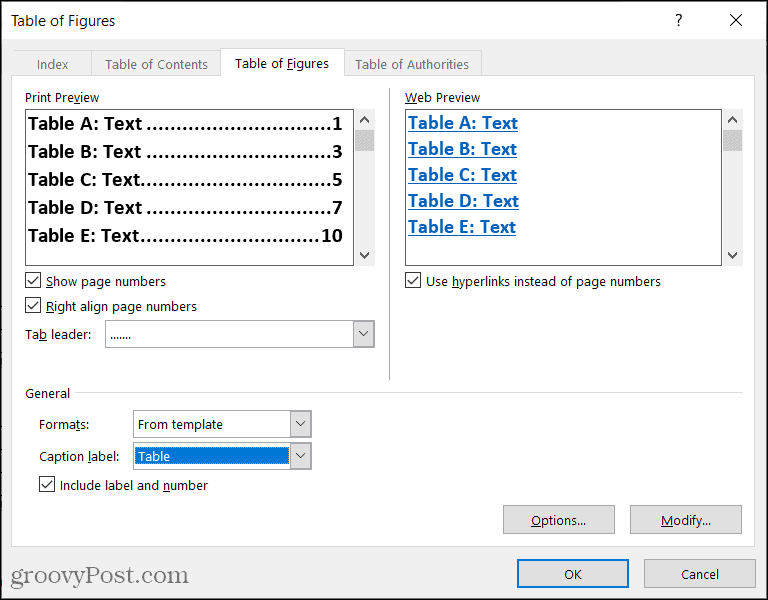
The Table of Figures window will display. This is where you customize the appearance of the table. First, confirm that the Table of Figures tab is selected at the top.
The top of the window is divided into two sections: Print Preview and Web Preview. Each of these offers customization or two of its own. Work with the one on your document view. Print Preview: You can show the page number and/or right align to those page numbers by checking the corresponding boxes. If you use both, you have the option to select a Tab leader in that drop-down box. This lets you use dots, dashes, or lines between the label and the page number.
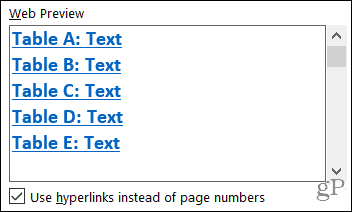
Web Preview: You can check the box to use hyperlinks instead of page numbers for this view. And it’s obviously a helpful way to navigate to the table or figure with a simple click.
Next, move down to the General section of the window for additional customization options. Formats: Various formats are available to pick from, each with a slightly different look and feel. You can select one to match your document or one that’s simple or formal.
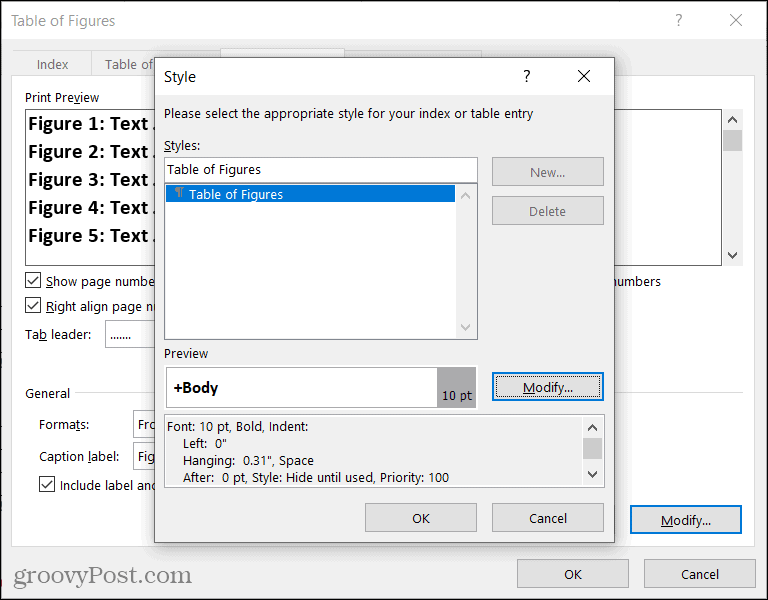
If you prefer to create your own table formatting with specific fonts, you can modify the Table of Figures template. First, select From Template under Formats and then click the Modify button. Just note that you will be changing the default template for that object.
Label: This is a key element of the Table of Figures. Be sure to select the type that matches your items. For example, you can pick Equation, Figure, or Table. Include the label and number: This is an optional checkbox and depends on the text you include with your caption. For instance, if you only want the caption text to display rather than the label and its number, uncheck this box. Here’s an example to illustrate the difference. We have two figures with the captions as “Figure 1 Daisies” and “Figure 2 Roses”. With the box checked, they display exactly like that in the Table of Figures because we include the label and number. With the box unchecked, you only see the text in the table, Daisies, and Roses.
When you finish selecting all the options for your Table of Figures, click OK to insert it into your document.
Update a Table of Figures
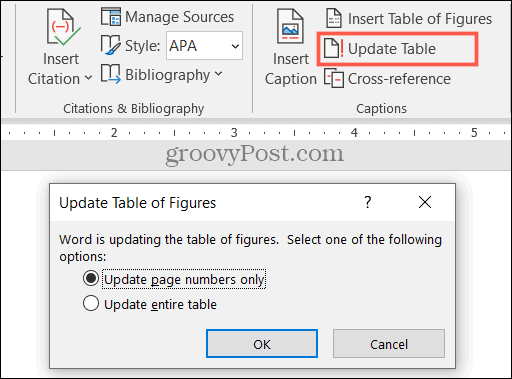
If you insert a Table of Figures and then add or remove figures or tables or edit the captions, you can update the table to reflect your changes.
You should then see your table update with the new items you added and any other changes you made to the captions.
Help Your Readers With a Table of Figures in Word
Just like a Table of Contents, a Table of Figures can be beneficial to your document viewers. So keep this convenient tool in mind for your next Word document! Comment Name * Email *
Δ Save my name and email and send me emails as new comments are made to this post.
![]()

